September 7, 2026 Post by : Editorial Editing
Editing Warm Light Without Going Orange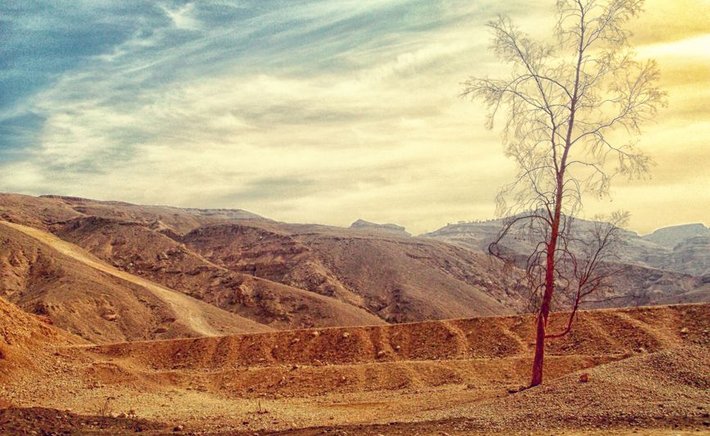
Warm light is easy to shoot and surprisingly easy to ruin in post. The most common mistake is stacking warm adjustments — white balance, split toning, saturation, color grading — until the image looks like it was shot through a jar of honey. The second most common mistake is the opposite: pulling all the warmth out in an attempt to 'correct' the scene, leaving a golden hour image that looks like it was shot at noon. The path between those two failures is a workflow that treats warmth as something to shape, not something to add or remove.
Start in your RAW processor with white balance, and resist the urge to make it 'accurate.' If the scene was warm, the white balance should be warm. The question isn't whether the image looks neutral — it's whether the warmth is in the right places. A golden hour image typically has warm highlights and relatively neutral or slightly cool shadows. If your shadows are also warm, the image will feel flat and muddy. If your highlights are neutral, the image will feel like it's missing something.
Shaping Warmth in the Tone Curve
The tone curve is where a lot of the real work happens. Rather than pushing the temperature slider further, try lifting the highlights and warming only the upper end of the curve. This mimics the way warm light actually behaves: it's concentrated in the brightest parts of the scene, not evenly distributed. In a portrait, this means the sunlit side of the face gets the warmth while the shadow side stays cooler — which is exactly how the light looked in real life.
For shadows, a slight cool tint (a few points toward blue or cyan) often makes the warm areas read as warmer by contrast, without actually increasing saturation anywhere. This is one of the most useful tricks in warm-light editing, and it's subtle enough that it rarely looks like a 'look.' It just looks like the light was good.
Skin Tones and the Saturation Trap
Warm light and skin tones can fight each other, especially in portraits. Pushing global saturation to make the light feel warmer will also push skin toward orange or red, which almost never looks good. Instead, use targeted adjustments: increase saturation in the yellows and oranges that make up the light and the environment, and pull saturation down slightly in the reds that dominate skin. If your editing software has HSL controls, this is where they earn their keep.
Finally, check your image at 100% and at thumbnail size. Warm-light edits often look great zoomed in and fall apart as a small preview, or vice versa. If it holds up at both scales, you've probably found the right balance. The goal isn't a warm image — it's an image that feels like the warm moment you were standing in.

Author

22 feb,2025
This incident opened my eyes to the value of Insurance in general, so I decided to examine my personal and business insurance.


Comment (3)
The payments are made directly from one person to another without passing through a central bank or clearing house.
22 feb,2025
ReplyEditing Warm Light: A Practical Workflow From RAW to Final
23 feb,2025
ReplyThe 40-Minute Window: Timing Golden Hour Like a Pro
23 feb,2025
Reply